Inverter install:
I did not want the electronics to get damaged so I cut a board and covered it with Basement fabric. To make sure that the fabric would stay tight I used carpet glue on the front and screws on the back. To give that a purpose I decided to use the Board as a TV mount since the RV did not come with an outside TV. 2"x 2" angle was mounted on the sides of the basement to mount the TV board to since the Compartment opening is smaller than the inside.
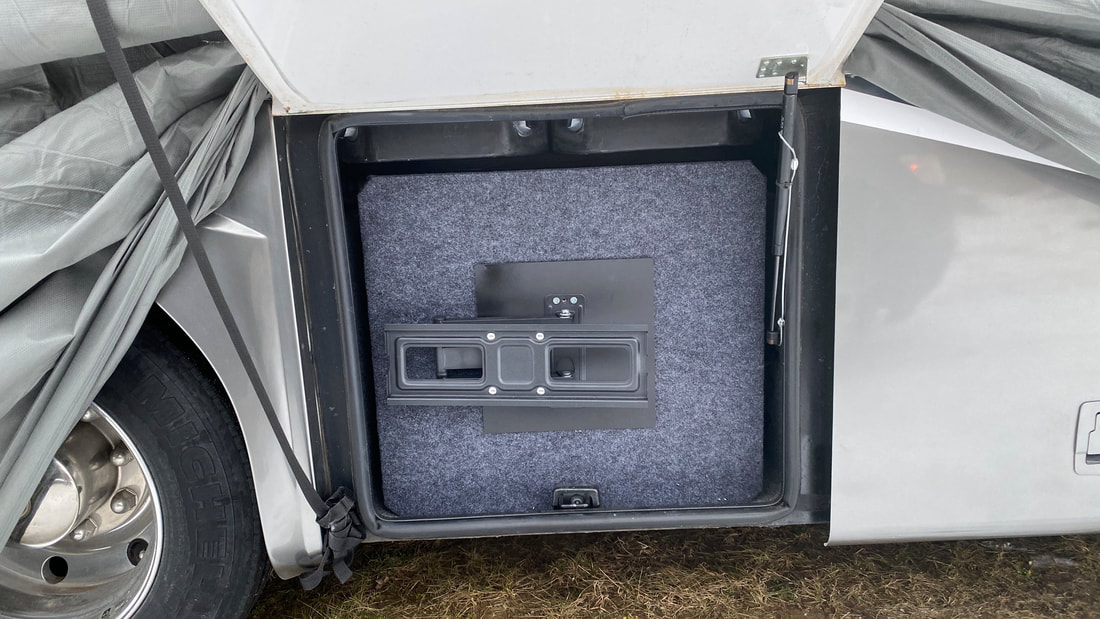
Electronics Board: I made an identical board as the TV board, mounted everything and connected everything before installing. I used a Battery quick disconnect and 50amp plugs so that I could remove the the entire board to work on any problems. I used M8 rivet-nuts into the back basement wall so that I can bolt the board securely to the RV.
Power from the 50 amp Coach Automatic Transfer Switch (ATS) was disconnected from the AC Electric Panel and attached a 50 amp outlet. A 50 amp plug from the 2nd New ATS will plug into the 50 amp Coach Outlet. Another 50 amp male plug was installed to feed the AC Panel and a 50 amp female plug installed from the 2nd New ATS.
My concern was if anything went wrong the entire coach would not have power, this way if all goes wrong I can disconnect the board from the system and just plug the Male plug from the AC Panel and plug it in to the Female Outlet from the 1st ATS.

